POM MAKER TUTORIAL
How to make a spooky pom pom spider
Easy & fun Halloween project for beginners
POM MAKER TUTORIAL
How to make a spooky pom pom spider
Easy & fun Halloween project for beginners
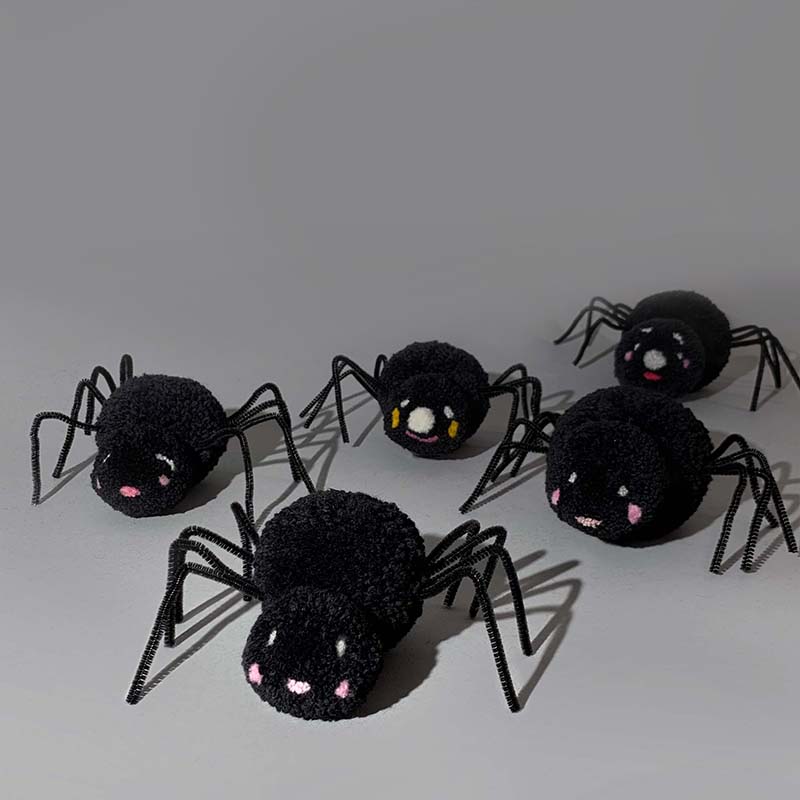
Let’s get ready for Halloween and create some pompom spiders using Pom Makers.
These spiders are adorable and spooky at the same time, with smiling faces and crawly legs made of pipe cleaners.
In this tutorial, we show you how to create simple but adorable facial features and how to join two pompoms.
Enjoy!
Share the love

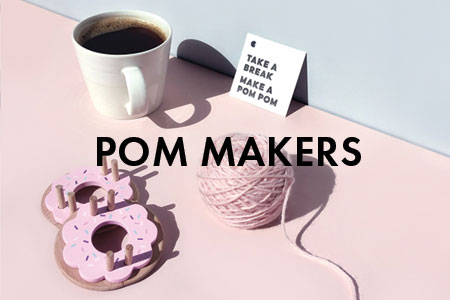
What you will need:

•Pom Makers
For the head and body of the spider, you will need 2 different size pom makers.
We used medium Pom Maker and large Pom Maker for a large spider.
But you can use any combination of different sizes like Extra-Small and Small or Small and Medium.
Please see our pompom size guide to estimate the size of your spider.
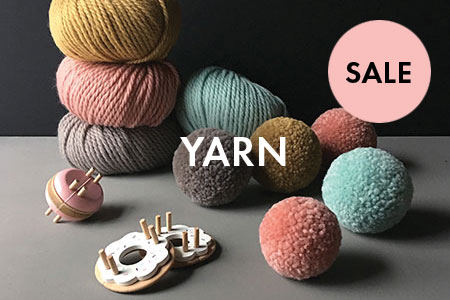
•Yarn
Choose your main base color for the spider – black, brown, grey- any dark shade works well here. We recommend 100% Wool Aran weight.
You’ll also need small amounts of various white and pink yarn.
White yarn for the eyes, pink yarn for the mouth and cheeks. We used a little bit of this super chunky yarn for the cheeks.
•4 Black pipe cleaners per spider
•Large sewing needle
•A felting needle
•Pom Pom Scissors
Ideally large scissors for cutting the pompom and a small pair for some precise trimming (optional)
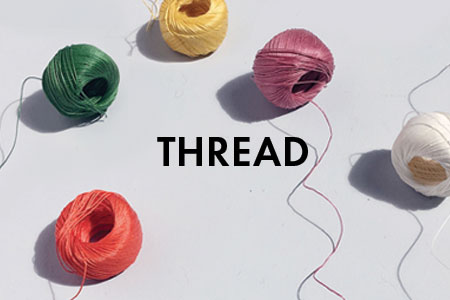
•Waxed Thread
Optional, but recommended. Use strong non-slip thread if you can.
STEP BY STEP
Follow our detailed tutorial below for making a pompom spider
1.
Planning
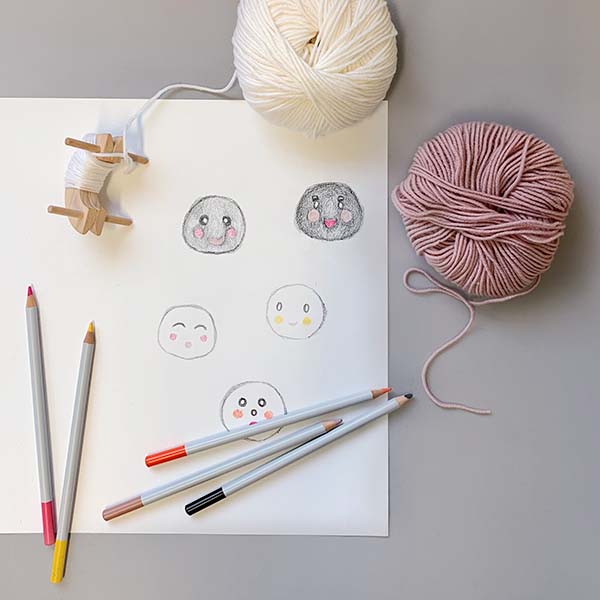
A tip that helps us when designing, is to draw out some examples first. Think about the facial features, expression and color choice. You’ll only need to do this for the head section as the body will be a plain pom. Draw a vertical line through the center of the drawing, as this is useful for scale. You can figure out the positions of each feature.
Then gather up your equipment and we are ready to go!
2.
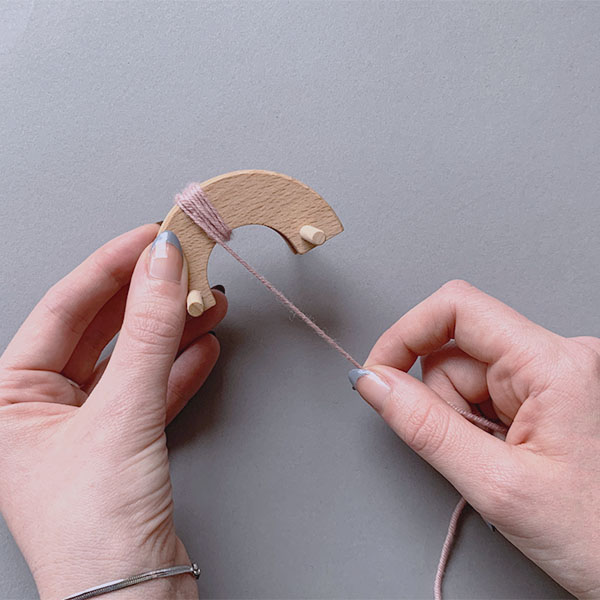
Little pink mouth
Wrap approx 15 counts of pink yarn positioned in the middle section on your Pom Maker, slightly off the center. Make sure it’s wrapped tightly in a small bunch.
This section will form the mouth and will remain positioned together when the pompom is cut from the Pom Maker.
3.
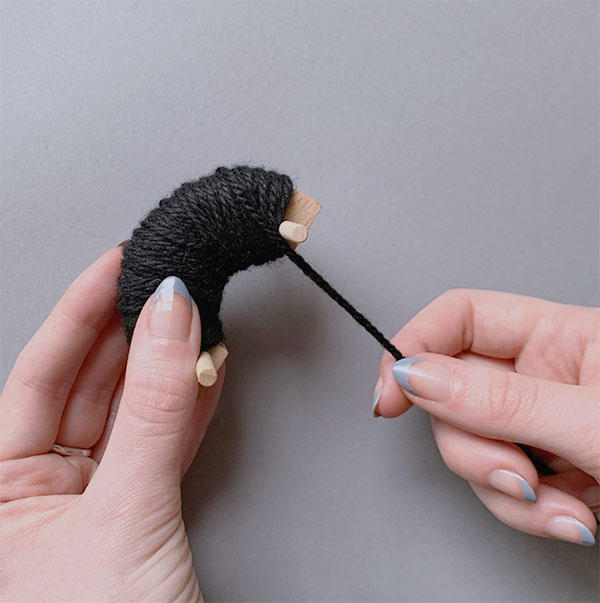
Starting to build the head
Wrap several layers of black (or whichever color you have chosen for the main spider color), across the whole Pom Maker half. Cover the previous pink yarn, keeping the layers as even as possible.
4.
Add some eyes
When you think you’ve reached the correct distance between the eyes in layers of black yarn, use your white yarn to wrap just over half way on the Pom Maker, above the mouth.
We wrapped about 8 times here for small cute eyes. More wraps will make larger eyes, so this depends on your design.
Pompom faces tend to look cuter with the eyes further apart, so make sure you have enough layers of black yarn underneath.

5.
Rosy Cheeks
Now take your chunky pink yarn and position it in between where the eye and where the mouth are, in the middle of the Pom Maker. Wrap the yarn around twice.
A yarn that is loosely twisted works well here, to give a rounder, fuller texture to the cheeks.
If you’re using normal pink yarn, wrap it enough to create large cheeks.
6.
Finishing the face
Now that you have created the facial features, we are going to finish the rest of the spider’s head.
Holding the pink yarn in place, take the black yarn and wrap even layers all over, until the Pom maker is full and all the other colored yarn is covered.
The Pom Maker can take a lot of yarn. The fuller you make your wraps, the more spherical your pompoms are going to be.
7.
The Rest
Now for the back of the head. Take your black yarn and on the other half of your Pom Maker we will wrap even layers until it is full.
Remember to make sure you have wrapped enough to match the other half of the Pom Maker.
Great that’s the wrapping done for the head pompom!
8.
Tying up the pompom
Put the two halves of the Pom Maker together, and connect them.
Now cut through the wrapped yarn and fasten the pompom yarn tightly with black, waxed thread (or any strong thread will do). We usually wrap the wax threads around twice before tying.
Then take the pompom of the Pom Maker.
See the full tutorial of how to make a basic pompom if you need.
9.
Trimming
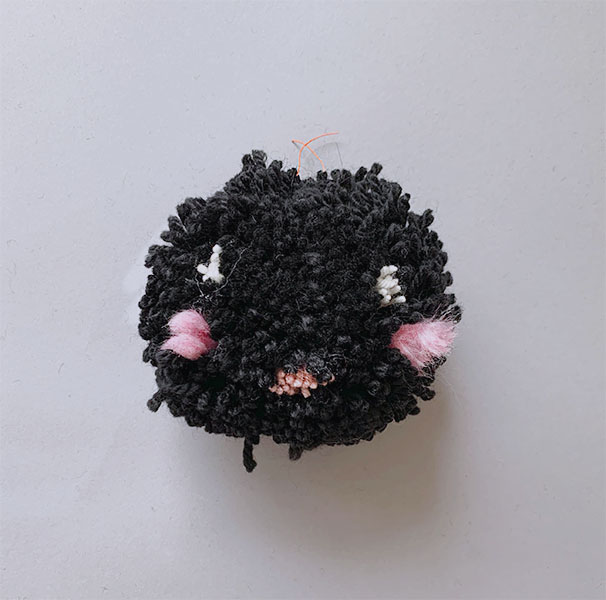
Start trimming the head all over aiming to create an even sphere. Next, cut away at the eye area, this will start to make the features more prominent.
Keep sculpting the face- cut in where the mouth is, shape the forehead, round cheeks, chin etc.
Experiment with this section so that your spider will have its very own quirky features and expression!
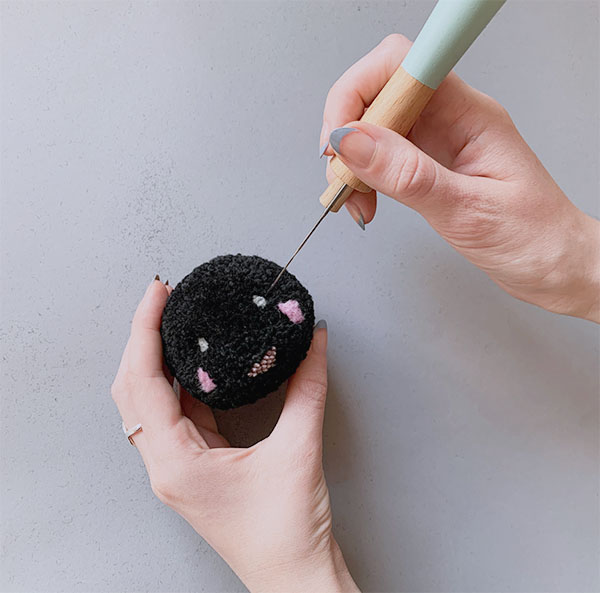
10.
Using the felting needle
Take your felting needle and push the colored yarn specifically where you want it.
You can make the eyes rounder and keep them in place by felting the white yarn. For the mouth you can felt it into a more specific shape, we chose a smile. There is some freedom to push and move the yarn about, so you can get the features just where you want them!
Keep shaping the head using your big and small scissors. Small scissors are useful for reaching the smaller detailed sections like the mouth.
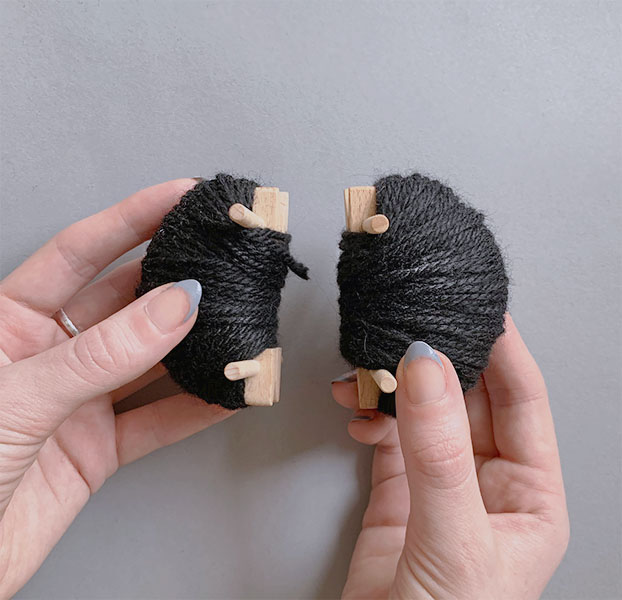
Nice, now you’ve finished the spider’s head, you can set it aside for the moment!
12.
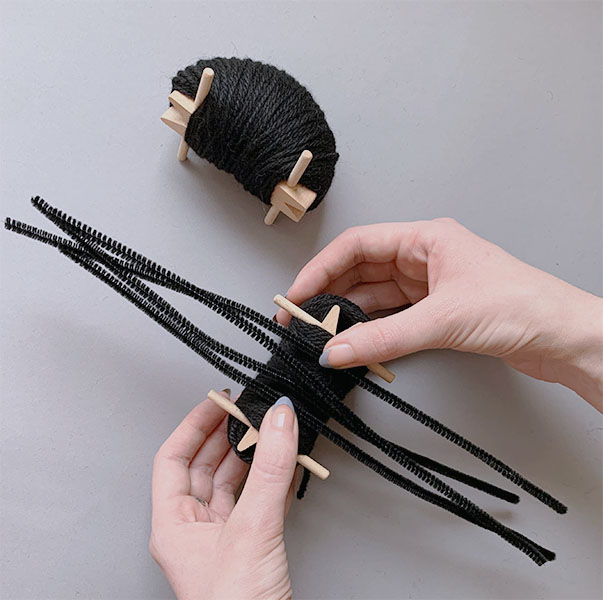
The Body
Now we are onto the spider’s body. We are going to use the large Pom Maker now, (you can use any sized Pom Makers for this project, the head just needs to be made on a smaller sized one than the body).
Wrap your black yarn evenly filling both sides of the Pom Maker. If you want to create different textures for the body, you can try out alternative yarns, for example, if you wanted a fluffier effect you could use a thicker yarn.
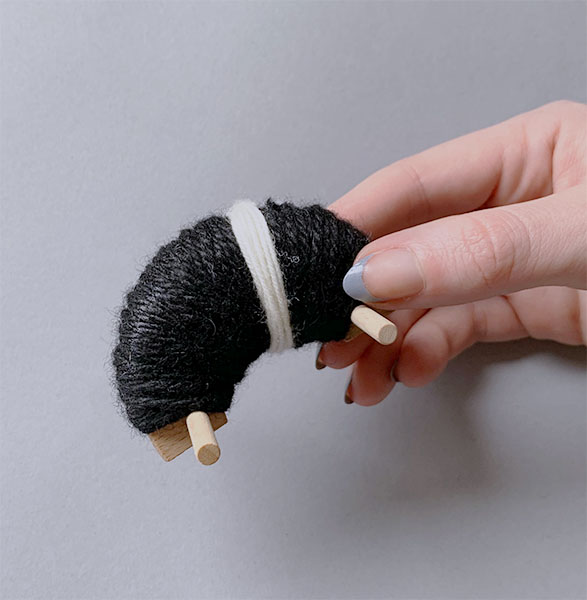
Once you have wrapped both sides of your large Pom Maker, take four black pipe cleaners and place them evenly spaced between the two halves of the Pom Maker.
13.
Finishing the body
You will need to bend the pipe cleaners when you connect the Pom Maker together.
Cut around- following the previous method for tying the pompom together.
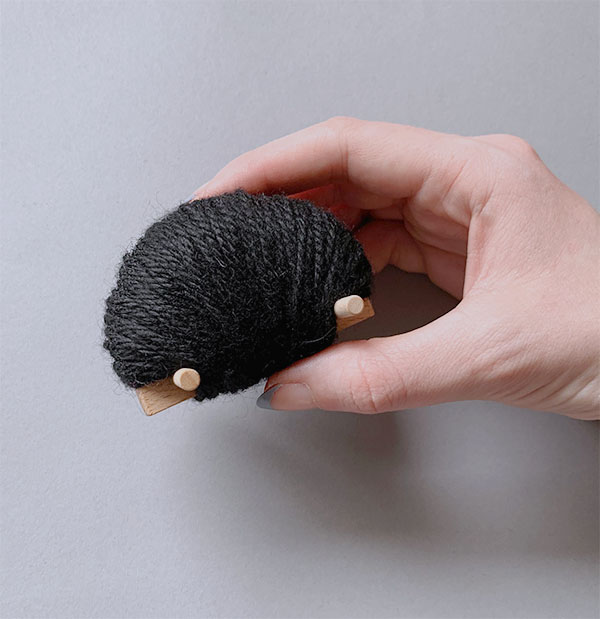
14.
Trimming the body
Trimming the body pompom is a little bit more challenging than normal with the pipe cleaners sticking out.
Try to carefully trim around the pipe cleaners, to create a neat circular body shape. Keep trimming with small curved scissor movements until you are happy.
15.
Joining Time
Take the sewing needle and thread it with a piece of the waxed thread.
Next, pick up the head and turn it so that you can see the back, you are going to part the yarn until you find the wax thread that is holding the pompom together in the center. Midway up the pompom, you’ll thread the needle under the waxed thread and out the other side.
Tip:
You can use a bright colored waxed thread to make it easier to see the center.
16.
Joining Time
Take the end of the same thread and repeat it on the body, so the two pompoms are connected with the thread.
Position the head, then pull the thread to bring the pompoms together. Knot it several times. Try not to make it too tight or the head pompom will get misshapen.
17.
Extra Trimming
Using your felting needle, shape the yarn back into place where you’ve joined the head and body together. You might need to do a final bit of trimming especially on the tummy so that the spider sits at the right angle.
Then we are going to bend each pipe cleaner to form the legs. You can really make it look as though the spider is crawling!
18.
Finishing Touches
Tah-dah your spooky spider is finished!
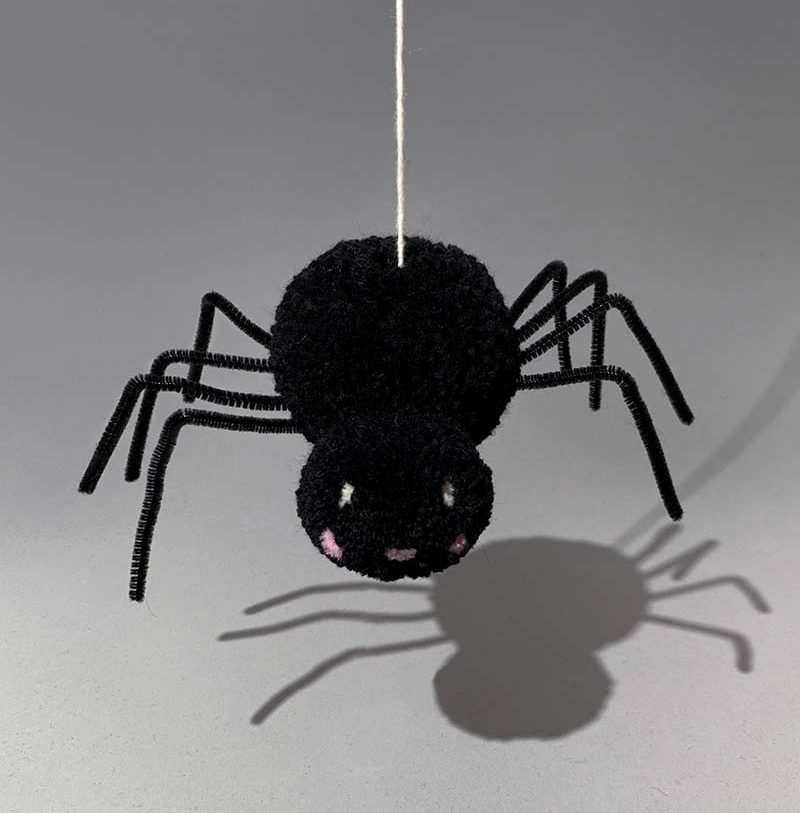
Here are some ideas...
Tie a white string in the centre of the body and hang it.
They will spin and dance. It makes a nice mobile and great halloween decoration.
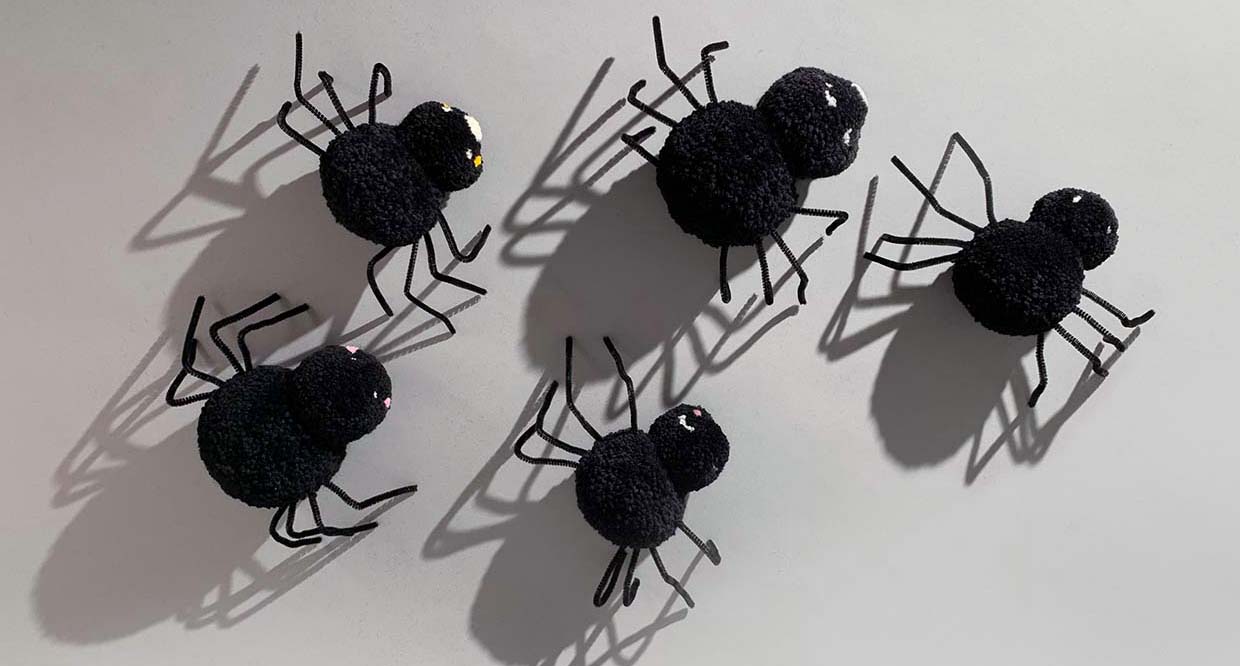
You don’t have to make the faces, but instead use a plain pompom for the head. Make many spiders to create a very creepy decoration to impress. Use a combination of different size Pom Makers to make small and large spiders.
Or how about putting one on top of your head or shoulder – the friendly spider makes a perfect halloween pet and accessory for your costume.
Happy pompoming & don’t forget to share with #WeArePomMakers or tag us on Instagram.
We love to see your creations!
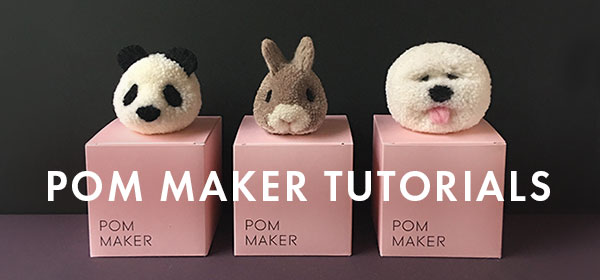
See more Halloween Tutorials
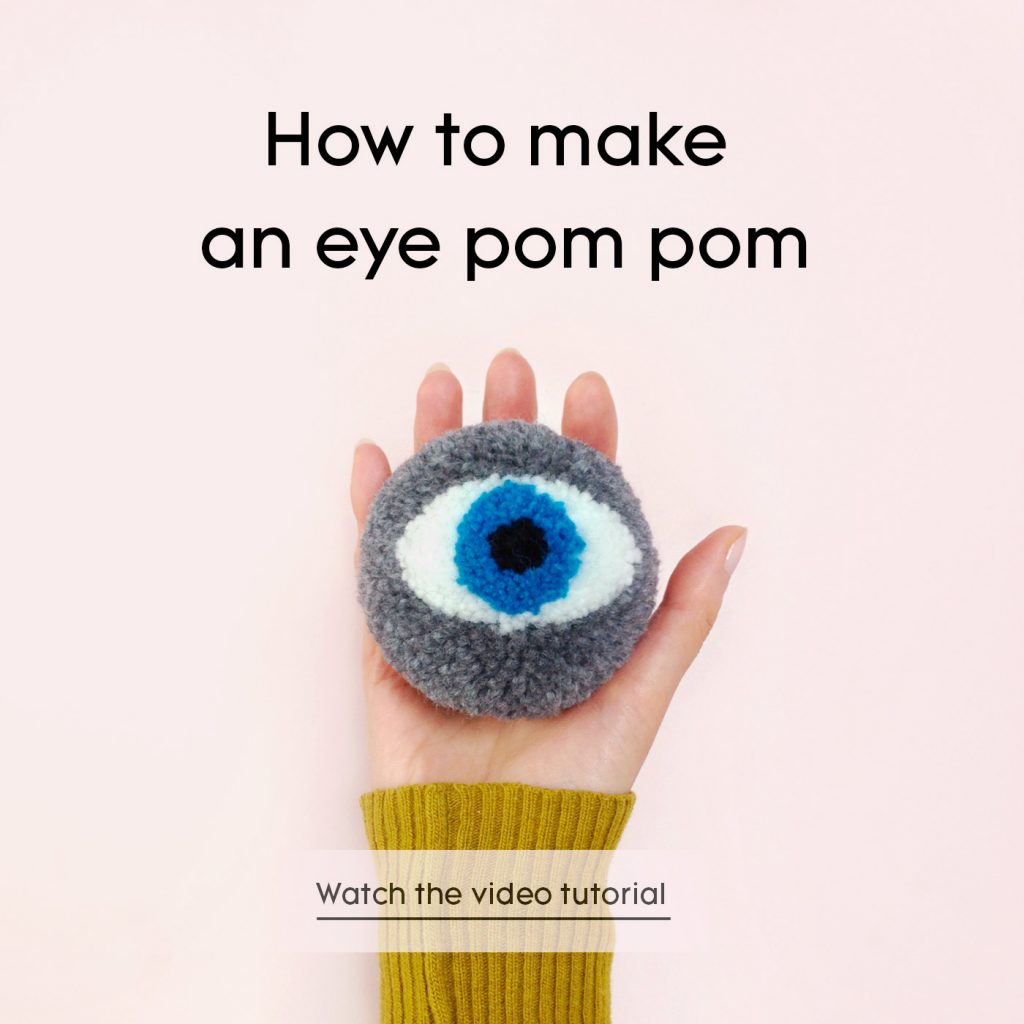
How to make an eye pompom
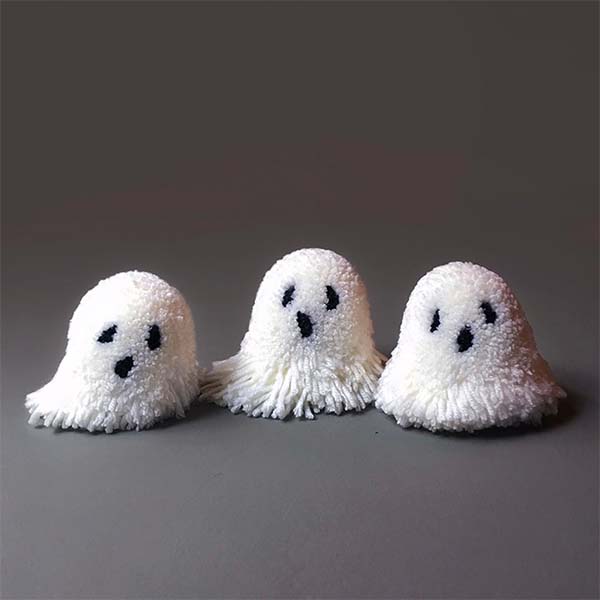
How to make a pompom ghost
- SHOP
- TUTORIALS
Pom Maker Hacks
For Kids & Holidays
- SOCIAL POM POM